
Styled with the most in-demand natural stone looks and hardwood species in mind, luxury vinyl floors present an incredible, affordable, and waterproof option for giving your entire home new life–ideal even for wet areas like kitchens, bathrooms, mudrooms, and basements! Although new flooring represents a major investment for many families, ProCore floating floor options come with an easy-to-use Fold Down Locking System, keeping DIY floor installations simple and budget-friendly, too.
If you’ve never completed a flooring installation, remember that even the most knowledgeable flooring experts were all beginners once! ProCore has all the resources to help you install like a pro, including technical instructions, YouTube flooring installation videos, and helpful FAQs. Our technical support team is also here to ensure you have all the information needed to successfully complete your flooring renovation project with confidence!
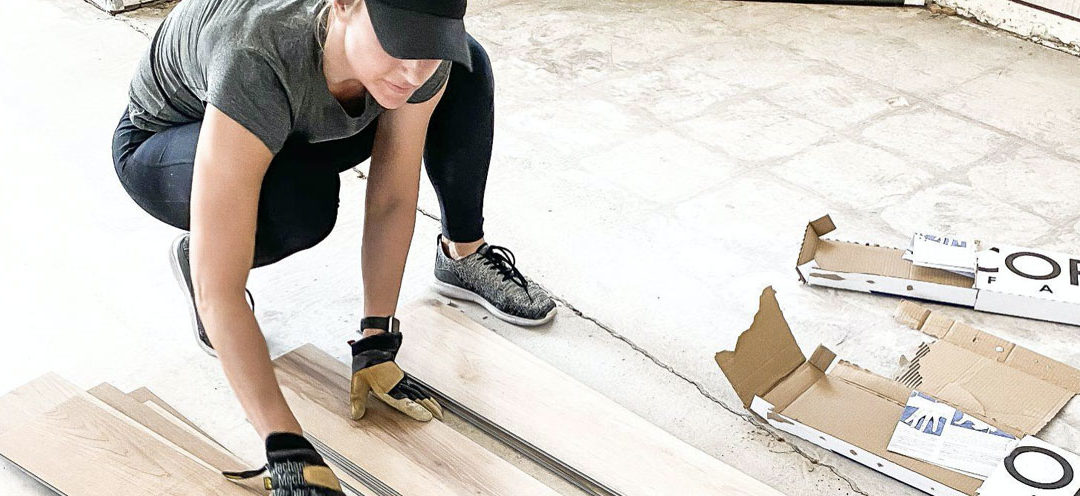
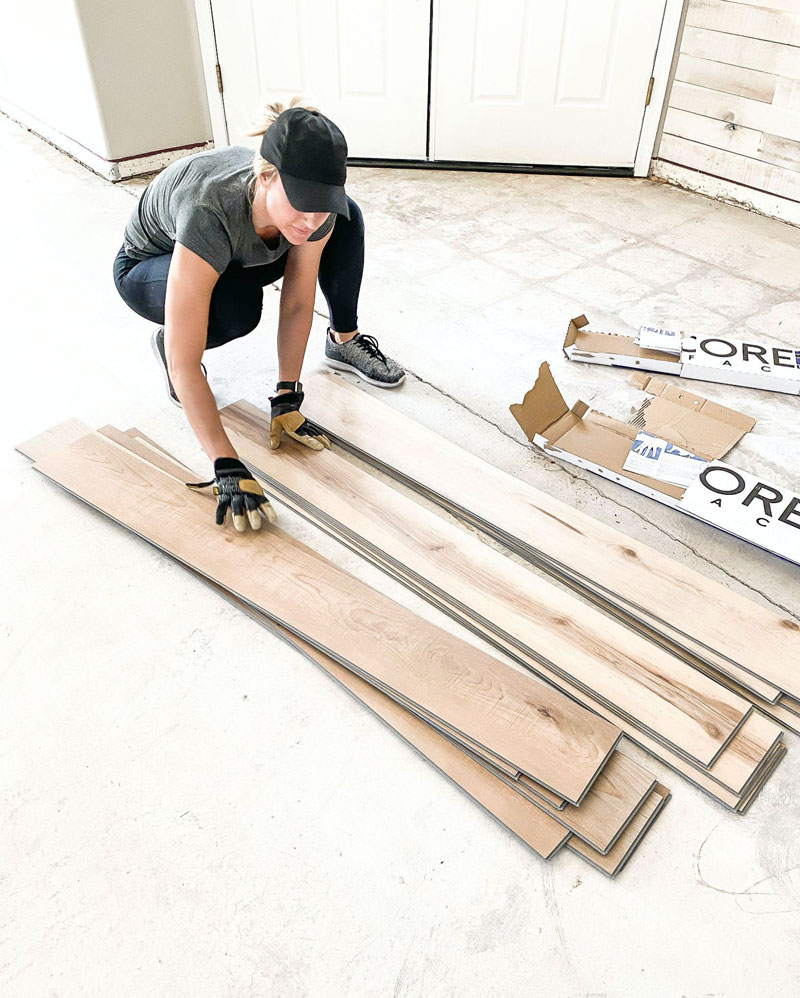
©Lolly Jane Blog // ProCore Pro Elizabeth Oak
Ready to refresh your favorite spaces? Here are a few key considerations and easy tips on how to install DIY floating vinyl flooring:
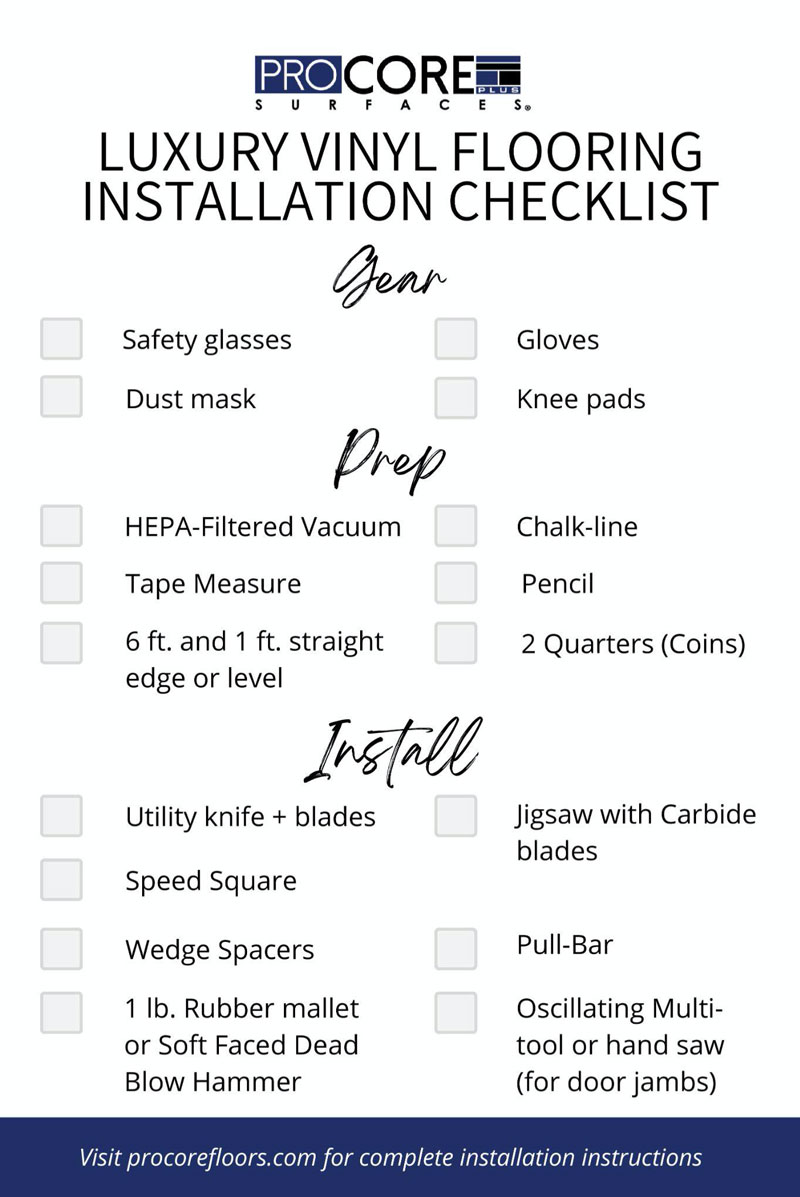
Gather Your Tools: Before you begin any installation, it’s important to make sure you have the right gear for the job! You will certainly want to wear Personal Protective Equipment (PPE) including safety glasses, gloves, and a dust mask throughout installation. Next, double-check this flooring tool list to ensure that you are completely prepared to handle every step (don’t forget to Pin it on Pinterest):
Prepare Your Subfloor: Make sure your subfloor is swept free-of debris by removing any staples, loose nails, or screws. You’ll want to smooth out any lumps or bumps so that your subfloor is flat, as uneven surfaces can telegraph through the finished floor over time. Remember, an unlevel subfloor could create issues with the locking mechanisms of your planks. If you need to level the subfloor, we recommend ¼” luan/plywood screwed into the wood floor. A floor patch could be used as well. Be sure to review our technical installation instructions carefully.
Don’t forget to remove any baseboards before getting started!
Undercut Door Jambs: Although this step is technically not a flooring installation step, undercutting door jambs will ensure there is enough clearance for the finished floor to slide underneath the doorway easily- and will help you avoid making difficult cuts.
Plan Your Layout: Now it’s time to choose the orientation of your finished floor. Most homeowners prefer for flooring to run parallel to the longest wall, but you can choose the direction however you prefer!
- Choose your starting wall. PRO TIP: It’s always best to start with a straight wall with a doorway. You’ll assemble the first row and then slide underneath the door jamb. This is much easier than finishing installation at a doorway.
- Carefully measure the room and plan out your layout before starting to avoid making difficult little cuts. The layout should be balanced with equal-sized planks or tiles on both sides of the room. After measuring the width of the room, mark your center line using a chalk reel. If your last row will be less than half the width of a plank or tile, you can simply move your starting line over by half the width of the plank or tile.
Inspect Your Planks: Prior to installation, it is important to inspect the tongue/groove areas of your planks to ensure they are free from any type of debris, which could prevent them from locking.
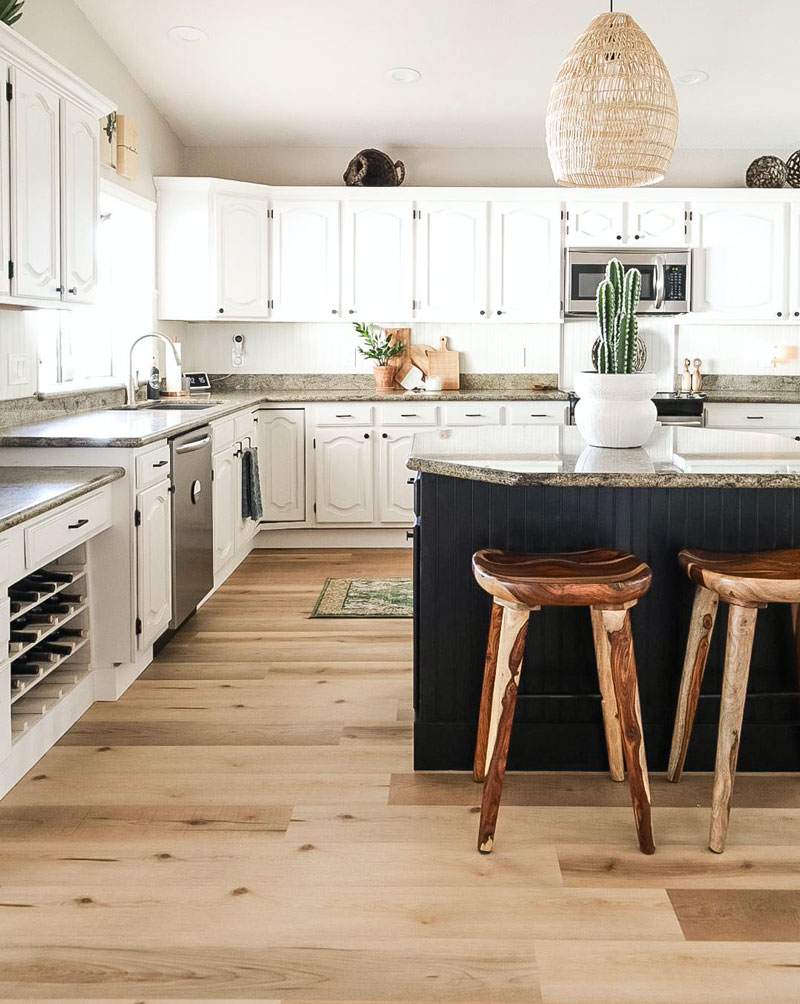
©CG Home Interiors // ProCore Plus English Grove Oak
Install Your Planks: Starting from the left corner of the room, remember to use the non-extended locking mechanism side and end next to the wall.
Don’t forget to leave an expansion gap! If the floor is less than 50 ft in length or width, leave at least a ¼-inch expansion gap around the entire perimeter. If the floor is between 50–85-ft, increase the expansion gap to ½-inch around the entire perimeter. An expansion gap allows floors to ‘flex’ through temperature changes in the summer and winter. Once your project has been completed, baseboards/quarter round and other non-movable objects like cabinetry should be attached to a wall, never directly to flooring.
- Installing a floating floor over a concrete slab? Don’t forget the moisture barrier! A 6 mil PE vapor barrier will ensure that any moisture changes in the concrete do not impact your vinyl flooring. For glue-down products, concrete subfloor must be tested per ASTM F2170 with 85% RH max. No other option of testing is permitted.
- Keep your first row of flooring as straight as possible to make all the following rows easier to install. Check the first row carefully, correct it if needed, and then firm it up with more wedge spacers to prevent any movement.
- Avoid using a black rubber mallet, which could leave markings on your floors that you’ll have to clean up post-installation. A soft faced dead blow hammer is recommended, but a white rubber mallet can be used as well.
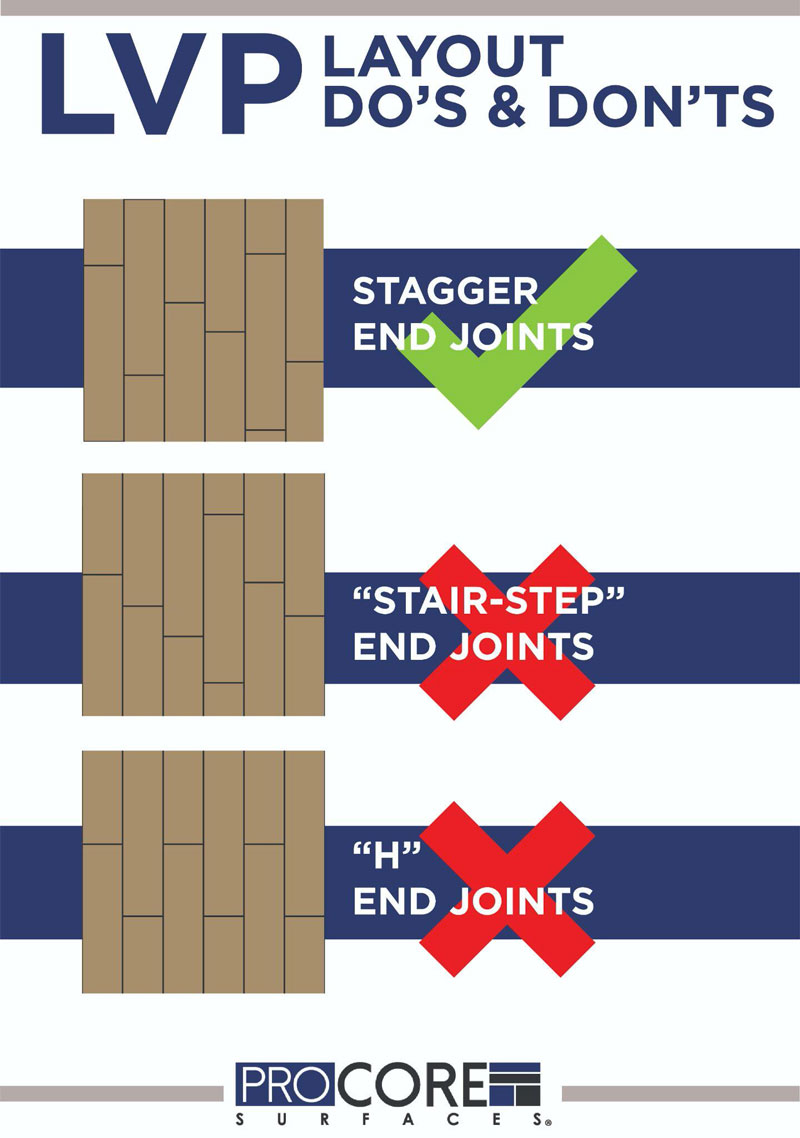
- Remember to mix things up! Select the flooring from several boxes at random to ensure a more natural-looking finished installation. Avoid making patterns or ‘stepping’ the rows and keep all end joints kept at least 6-8 inches apart.
- For lengthwise cuts, first measure (and allow for expansion gap) and mark both ends with a pencil. Use a straight edge or another piece of flooring, lined up on your marks, and mark your cut line. Carefully cut along your cut line using a jigsaw with a carbide blade. If you don’t have a jigsaw, use a sharp utility knife to carefully score alongside a straight edge a few times. Bend the plank until it snaps, then finish the cuts with your knife and trim off any excess.
- Never use a tapping block! Tapping blocks, if not seated properly against the edges of the flooring, can cause damage when hit with a mallet/dead blow hammer. If needed, use a scrap piece of flooring with the joint locked in before tapping it.
- After completing the first five or six rows of the floor, turn yourself around and continue installing the new rows with your body on top of the completed rows. You will then be “pulling” the side joints together rather than “pushing” them, which will make the remaining installation process even easier!
©CG Home Interiors // ProCore Plus English Grove Oak
Once your DIY installation is complete, show your finished floor some extra love by placing nylon or felt pads underneath your furniture. These hard surface “sliders” are available at Lowe’s just like ProCore Luxury Vinyl options!
As always, download the ProCore Installation Guide for your specific project and refer to ProCore Frequently Asked Questions for extra guidance, tips, and best practices.
You’ve got this! Be sure to show off your final project using #ProCoreFloors on Instagram for the chance to be featured in our social channels!
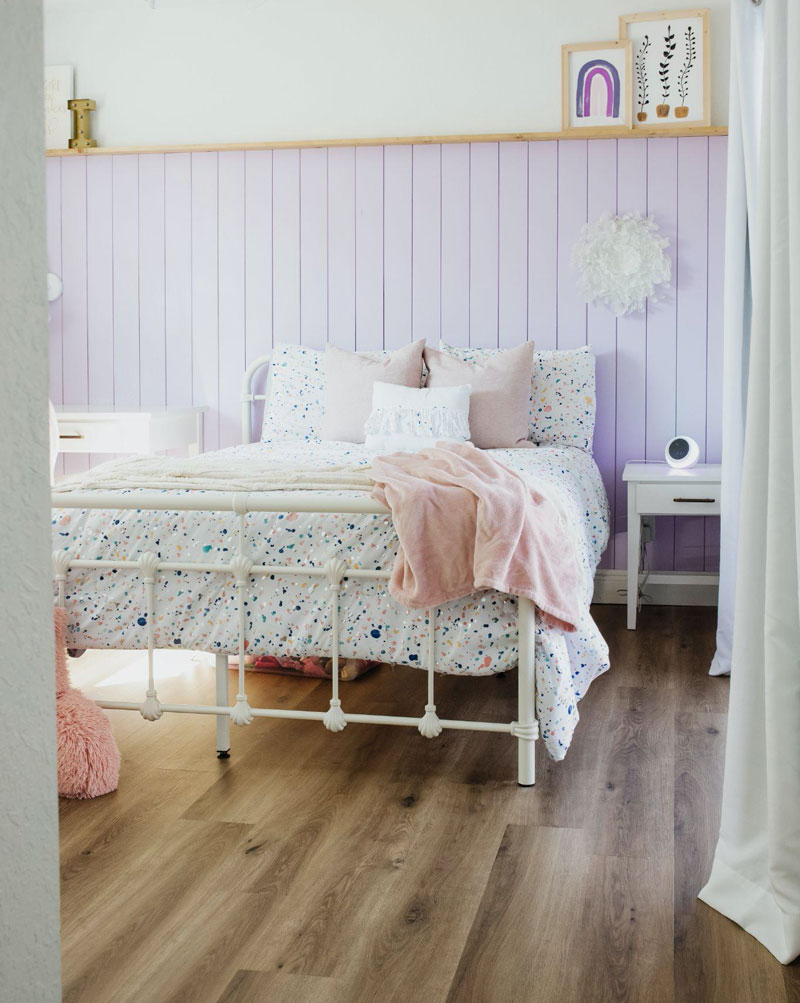
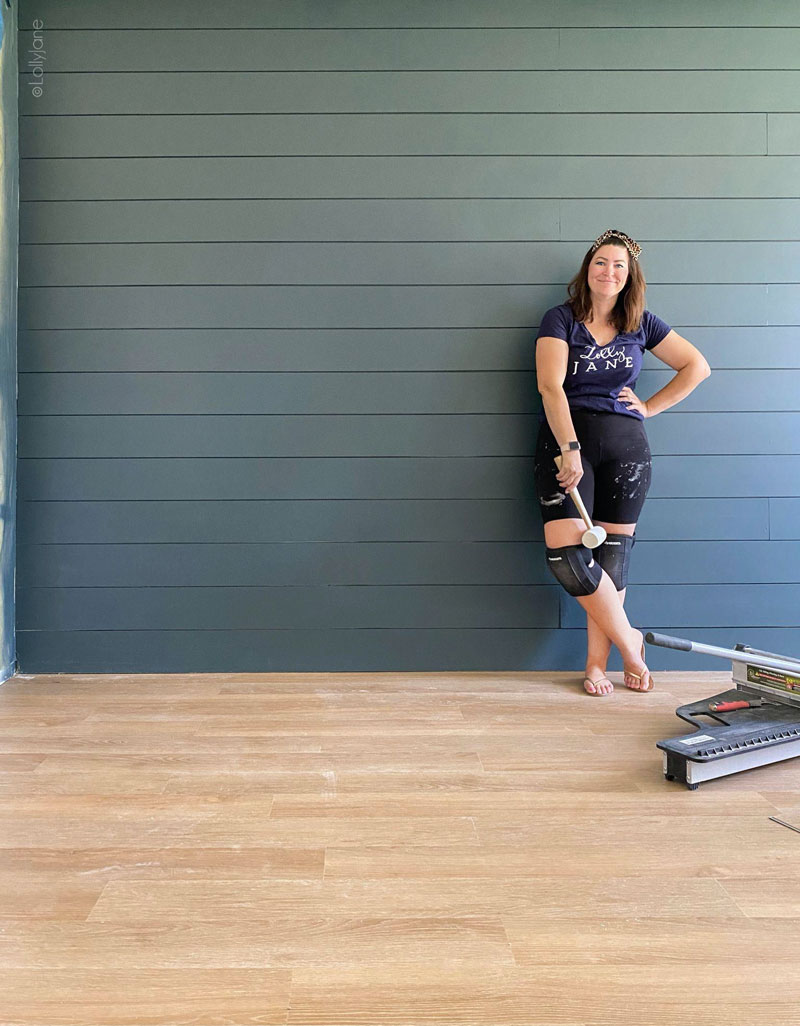
©Lolly Jane Blog // ProCore Pro Elizabeth Oak
*Important Note: These tips are meant to supplement our official instructions, not replace them. Please carefully review the technical installation instructions for your ProCore Plus and ProCore Pro products in order to maintain your product warranty.